The Featured section is the fixed showcase on your LinkedIn profile, sitting below About and above your Activity feed. Use it to pin a few items that prove you can do the job, not just claim it. If you take away one thing from this guide, make it this: lead with your strongest piece of evidence, whether that’s a case study, a press mention, or a 60-second video of you speaking. Everything else below is setup and refinement.
Before you touch the settings, know what the Featured section can actually hold:
- Posts and native articles you’ve published
- External links (with an automatic preview image)
- Uploaded media: PDFs, slide decks, images, short videos
- Newsletters you write or contribute to
Image sizing matters more than people expect, and we’ll get to the exact pixel dimensions shortly.
Table of Contents
- How do you add a LinkedIn Featured section?
- Which content types work best in the Featured section?
- How should you curate your featured items?
- What’s a quick checklist for auditing your Featured row?
- Why isn’t your Featured section showing up correctly?
- How TalentFB Coaches Executives to Use Featured
- Sources
How do you add a LinkedIn Featured section?
Setup takes less than five minutes once you know where LinkedIn hides the option. On desktop, go to your profile, click Add profile section, then Recommended, then Add featured. From there, hit the plus icon and choose whether you’re adding a post, a link, a media file, or a newsletter, then save.

On mobile, the path is nearly identical: Profile → Add section → Recommended → Add featured. If you don’t see the option, update the LinkedIn app first. It’s a known quirk that new features roll out to desktop before mobile, and Featured occasionally lags behind on older app versions. When in doubt, switch to a browser and finish setup there.
There’s also a shortcut most people never discover. Open any post you’ve already published, click the three-dot menu in the top right corner, and select Feature on top of profile. That pins it instantly, no need to hunt through settings.
- Open Add profile section → Recommended → Add featured
- Tap the + icon and pick your content type (post, link, media, or newsletter)
- Fill in a title and short description, then save
- Drag items left or right to reorder them by priority
- Click the pencil icon on any item to edit, or the trash icon to remove it
According to LinkedIn’s own guidance on managing featured samples of your work, reordering is drag-and-drop, so don’t overthink the sequence. Just make sure your best item ends up first.
Pro Tip: If you’re prepping for a job search or a rebrand, add and reorder items in one sitting rather than piecemeal over a week. LinkedIn’s algorithm seems to notice bursts of profile activity, and a freshly curated Featured row often coincides with a small bump in profile views.
Which content types work best in the Featured section?
Not every format performs the same way, and knowing how each one renders saves you from an embarrassing broken preview later.
- Posts and native articles carry built-in social proof (likes, comments, reshares), but you can’t edit them once they’re pinned. What you published is what shows.
- External links pull an automatic preview image through Open Graph data. If the destination site has messy OG tags, your preview looks messy too. You can fix this on the source page, or sidestep the whole problem by uploading the asset as media instead.
- Documents like PDFs and slide decks get an inline, swipeable multi-page preview, which makes them ideal for a short case study or a five-slide summary of a project.
- Video plays inline right on the profile, so a 30 to 60 second introduction or a clip from a talk tends to hold attention better than a link people have to click away from.
- Newsletters signal that you publish consistently, which reads as thought leadership even to viewers who never open a single issue.
LinkedIn confirms that uploaded media renders as a multi-page preview for documents, and video plays inline, which is exactly why a PDF case study often outperforms a plain text post for proving impact.
How should you curate your featured items?
Quality beats quantity here, every time. Aim for a moderate number of items; too few looks sparse, while too many dilutes attention and turns your Featured row into clutter nobody scrolls through.
- Front-load your strongest item. It sits leftmost and gets the most impressions and clicks, so don’t bury your best proof point third or fourth.
- Write an action-focused title paired with one line of context. Something like “Case study: grew ARR 2x in 9 months” tells a visitor exactly what they’re about to see and why it matters.
- Use images sized at 1200 x 627 pixels, a 1.91:1 ratio, saved as JPG or PNG under 5MB. Center your focal point, because LinkedIn crops aggressively on some screen sizes.
- Refresh the section quarterly, and always after a major milestone. A stale Featured row with a 2023 press clip tells visitors you haven’t done anything notable since.
Practical guides on optimizing the LinkedIn Featured section consistently point to that 1200 x 627 dimension as the fix for cropped, awkward-looking cards. It’s a small detail, but it’s the single most common visual complaint people have about their own profiles once you point it out to them.
Pro Tip: If you’re an executive candidate, tie every Featured title back to a number. Hiring managers skim. A title with a metric in it earns a second look; a vague title like “Great project” earns none.
For deeper guidance on aligning this with the rest of your profile, TalentFB’s breakdown of LinkedIn optimization tips that get recruiters calling walks through how Featured, headline, and About should work together as one coherent pitch.
What’s a quick checklist for auditing your Featured row?
Run through this before you consider your Featured section finished:
- Does every item align with your headline and About summary, or does one feel randomly pinned?
- Do thumbnails look sharp and centered, with no awkward cropping?
- Have you clicked every external link in the last 30 days to confirm it still works?
- Does each item give the viewer a clear next step, whether that’s a contact prompt or a portfolio link?
- Do you have a mix of formats (a document, a link, a video) rather than five nearly identical posts?
- Have you removed anything older than two quarters that no longer reflects your current work?
A few title templates worth stealing: “Case study: [result] in [timeframe],” “Featured in [publication name],” “Watch: my talk on [topic] at [event],” and “Product launch: how we shipped [thing] in [timeframe].” Each one front-loads the payoff instead of burying it.
If your OG preview looks wrong on a link, that’s almost always a thumbnail problem, not a content problem, and it’s worth fixing before you move on. TalentFB’s Executive Visibility Scorecard is a useful gut-check if you want a structured way to audit the whole row at once rather than eyeballing it.
Why isn’t your Featured section showing up correctly?
Most Featured problems fall into four buckets, and all four have quick fixes.
- The section won’t appear at all. Update your LinkedIn app, or switch to desktop and add it manually through Add profile section → Recommended → Add featured.
- The thumbnail looks wrong or ugly. Update the Open Graph image on the destination page, or skip the link entirely and upload the asset as media instead so you control the visual directly.
- A link is dead. Test every external link periodically and swap out or remove anything that 404s.
- Nobody outside your network can see it. Featured inherits your profile’s visibility settings, so if you expect strangers to see it, check your public profile settings first.
Pro Tip: Test your own links in an incognito browser window every few months. What looks fine to you, logged in, can look completely broken to a recruiter viewing your public profile.
How TalentFB Coaches Executives to Use Featured
When we prepare senior tech leaders for a job search or a personal rebrand, Featured is where “proof over claims” gets tested in real time. A title on a résumé is a claim. A one-page case study PDF showing a measurable outcome is proof, and that distinction is exactly what recruiters respond to.
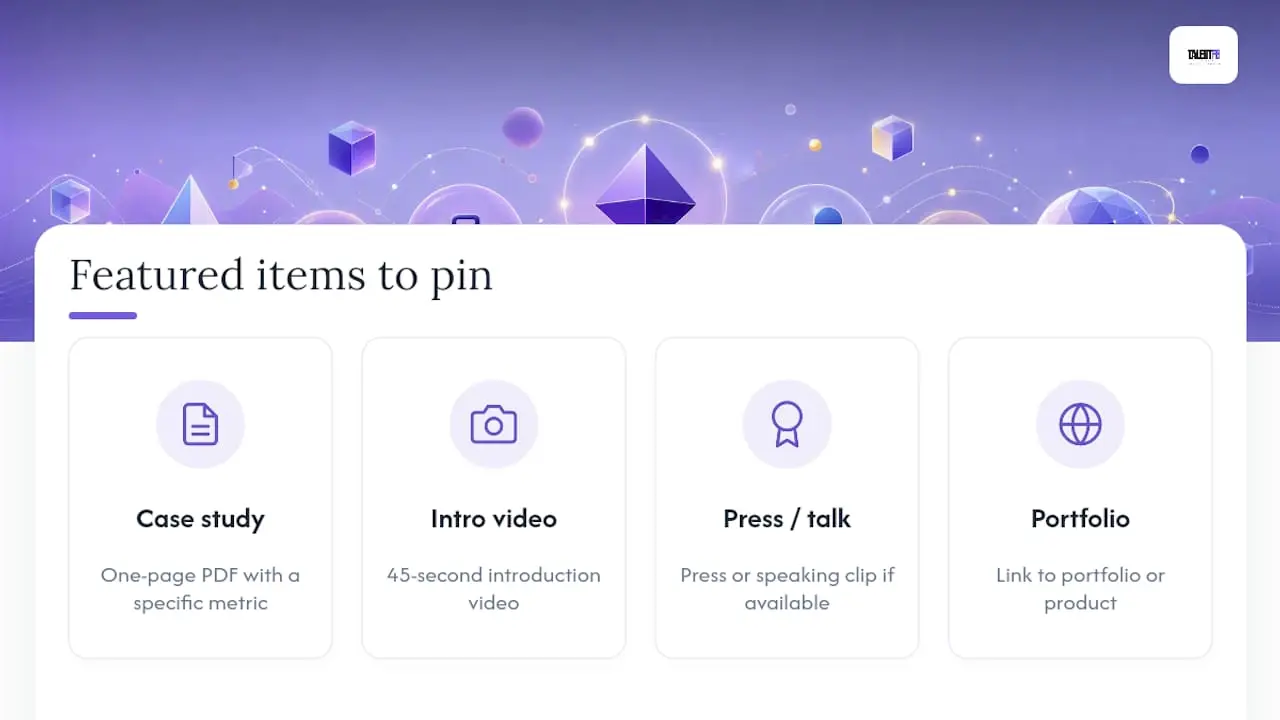
The items we typically recommend: a one-page case study PDF with a specific metric, a 45-second intro video, a press or speaking clip if one exists, and a link to a portfolio or product.
Hiring managers spend seconds per profile. A Featured row with visible, verifiable outcomes shortens their screening decision and tends to increase reply rates to outreach messages, because the evidence does the convincing before the conversation even starts.
Why I tell every client to build this section first
I prioritize Featured early in every executive engagement because it’s the fastest way to turn a skeptical viewer into an interested one. My two go-to recommendations: pin your most recent, most quantifiable win first, and review the whole row every quarter without exception. Track what happens to your inbound messages and connection acceptance rate after you refresh it. The pattern becomes obvious fast.
— Frederic Bonifassy
Get Hands-On Help Curating Your Executive Profile
Setting up Featured yourself gets you most of the way there, but pairing it with a rewritten headline, a sharper About section, and a real outreach plan is where the response rate actually shifts. TalentFB’s executive coaching engagements typically cover a full profile rewrite, hands-on Featured curation using the proof-over-claims framework above, and a targeted outreach sequence built around your strongest evidence.
If you want a fast, no-cost read on where your current profile stands before committing to anything, start with the free LinkedIn brand audit. It takes about two minutes and gives you a clear score to work from. For senior tech leaders ready to go deeper, TalentFB’s executive coaching guide walks through what a full engagement looks like from first call to a completed profile and outreach plan.
Sources
- Featured section on your profile FAQs
- The Most Important LinkedIn Profile Feature You Aren’t Using
- LinkedIn Featured Section: How to Add & Use It (2026)